Digital Frontier
Header
Main
CG MAKING
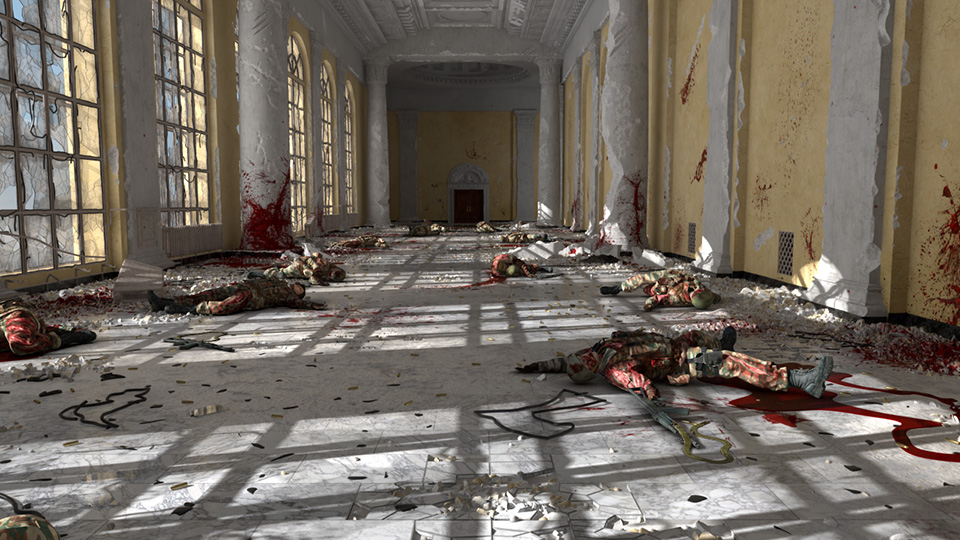
biohazard DAMNATION
October 2012 [CG]
Key points in CG film production process
The 2 big theme


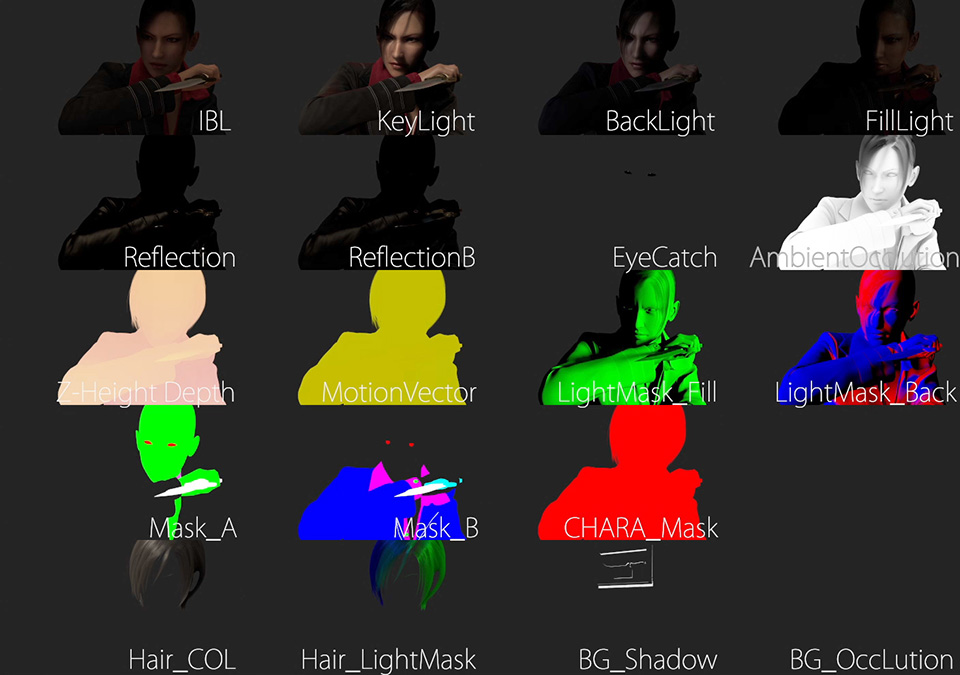
For character lighting we also created image for guideline. Lighting also plays an important role in creating realism and depth here.


When we were creating “Resident Evil: Degeneration” there were still some technical issues so we used dome light at that time. However, recent improvement in technology as well as designers’ skills allowed us to solve the final gather flickering issue and use HDRI.

By preparing color layer for each light we were able to create transparency of the skin. So compared to previous series, “Resident Evil: Damnation” has twice as much layers, roughly 20 layer materials per character.

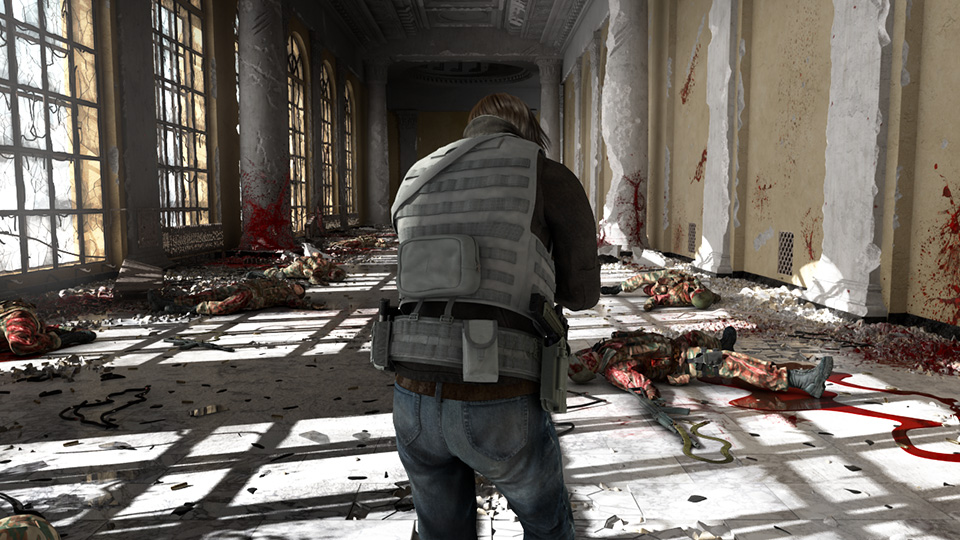
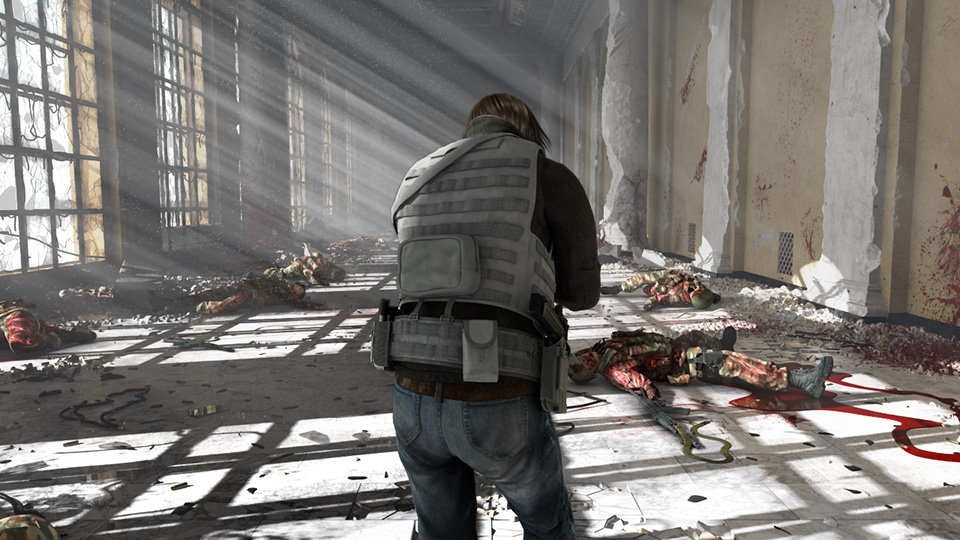
In this film we focused on fog to create sense of depth.
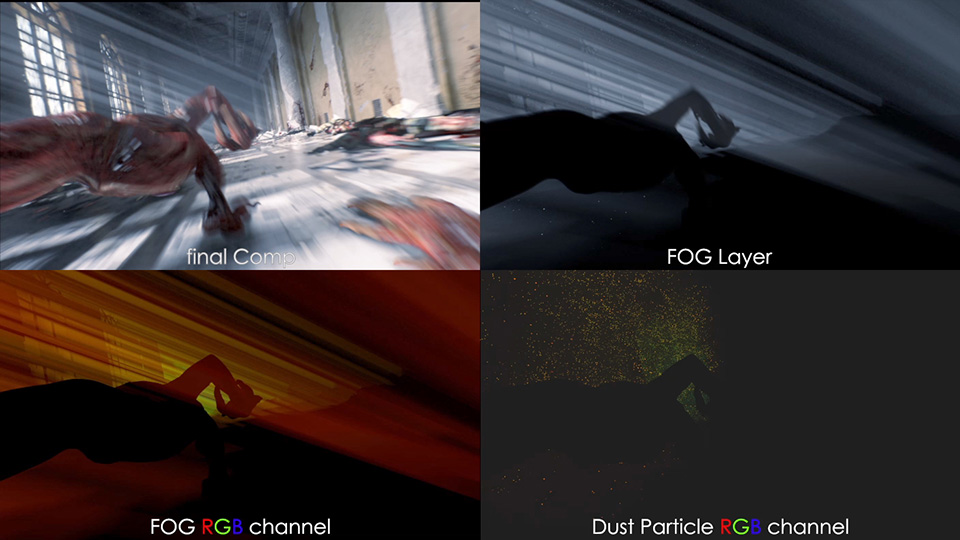
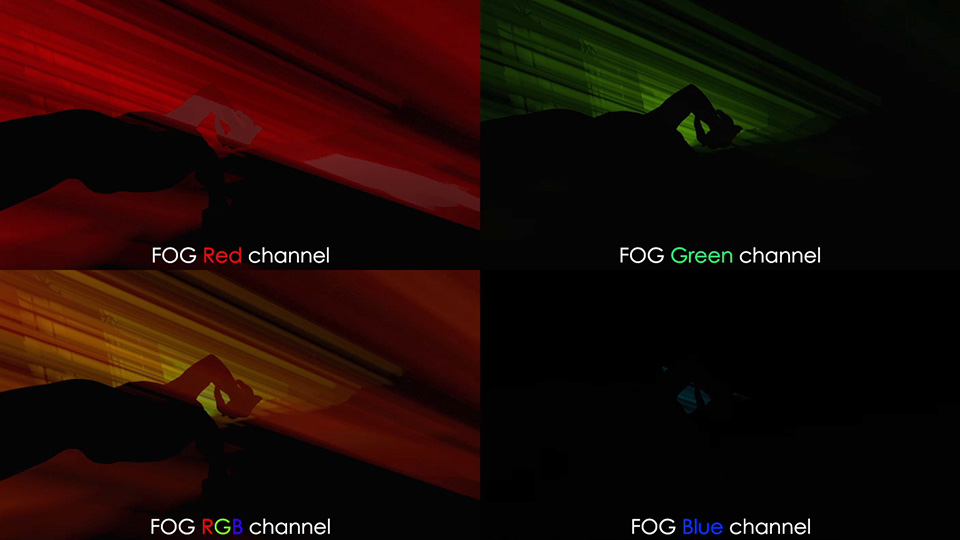


We used RGB to divide the layers so that we can adjust the depth. Also, by dividing fog material into separate channels, we were able to adjust field of view. Particles are divided in similar manner.
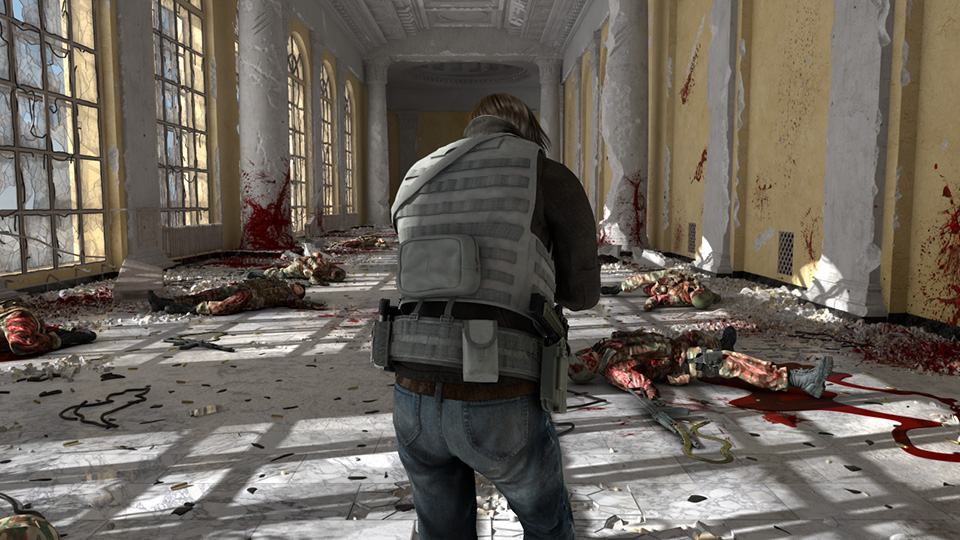
Another way of making a full CG realistic is to make the audience emotionally attached to the characters. That can be done by creating emotions and human-like gestures. At our studio we use facial capture to create such realistic facial movements. We take the facial capture data and transfer to locater and create expressions that match each cut using offset controller. This controller is set up on facial muscles and reads detail movements on the face. It allows us to create natural facial expressions and muscle movements.
Shot Breakdown
01 Pre-composite background layer. Background layer as one color layer while ambient and reflection are prepared separately.
02 Shadow and reflection layers are added on top of mob character layer.
03 Shadow and reflection layers are added on top of main character layer.
04 Light and dark have been adjusted after overall composite work.
05 Effect is applied. RGB is divided by perspective and lighting so darkness can be adjusted depending on depth and lighting in 2D environment.
06 Motion blur and defocus are adjusted using vector and depth. Then color correction is applied.
Muzzle Effect
In “Resident Evil: Damnation” there are several shooting scenes. For the guns to have its own characteristics preset muzzle flash that matches the flash binder was created. Flash suppressor is a device attached to the muzzle of a gun that reduces the amount of visible flash of light created by burning propellant gas. This tool allows us to select type of flash suppressor to match the type of firearm.
The impact depends on surrounding material. This is a simulation on concrete, metal, glass, and wood.
Two existing software and development of Alembic for 3ds Max
At Digital Frontier Maya software is used; however, in this project 3ds Max was used for background and effect. To bridge the two software, we installed Alembic. Alembic was developed by Sony Pictures Imageworks and Lucas Film in 2010 as open source software. In 2012, Maya supported version was developed but it did not support 3ds Max. So our technical team decided to develop 3ds Max version for this project. Thanks to the software, it solved many of the problems that were raised from cache.
You can download plug-in now for free by visiting the download page
Alembic itself was developed under the idea of open source so we have decided to distribute the plug-in for free. We also prepared user manual video and we hope that many of you will find it beneficial.
Below are PROS of using 3ds Max for Alembic.
■It is faster than Maya’s geometry cache.
■It is faster than FBX.
■Reads and runs over 1000 NURBS curve that is exported as Alembic cache on Maya.
As any other software it has its cons such as it large file size. Also, it does not support multiple UV map and still needs to solve few bugs. Hopefully we will be able to solve these issues in the near future.
DOI
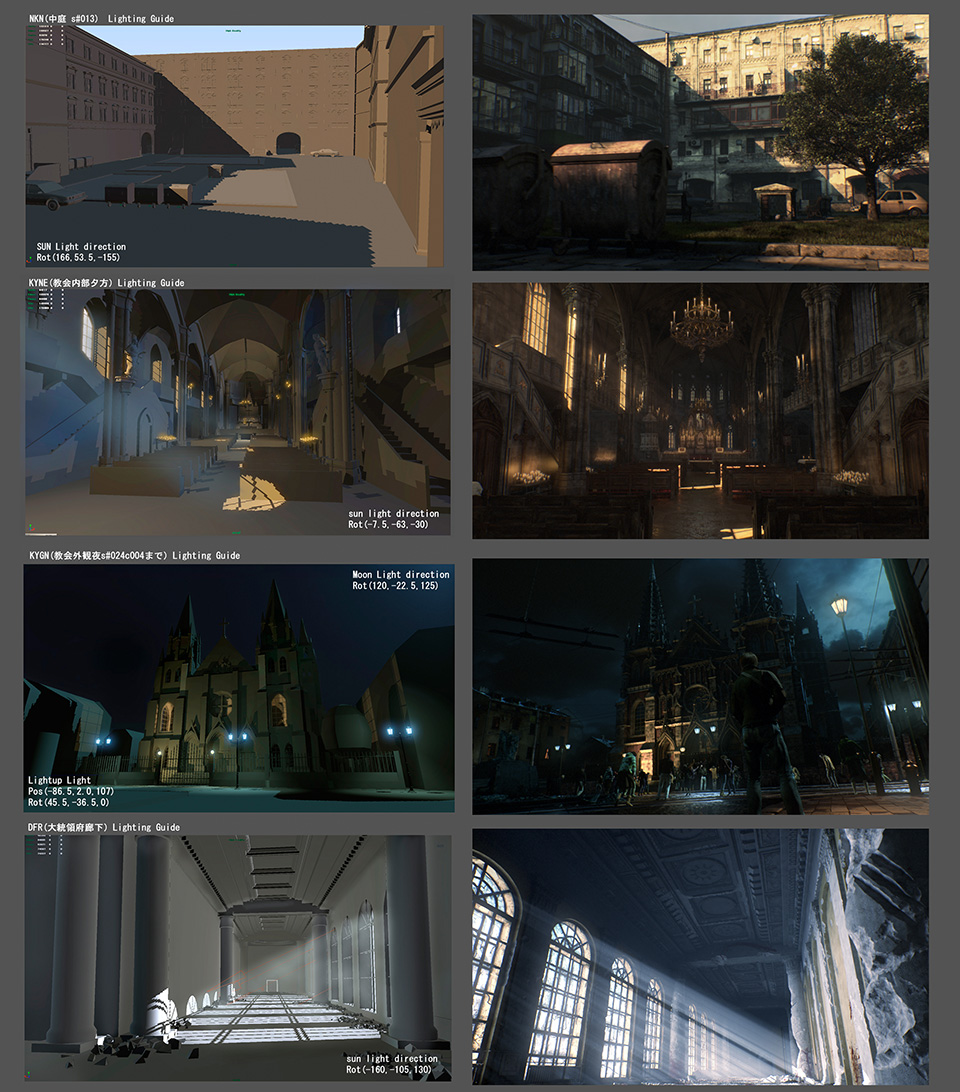
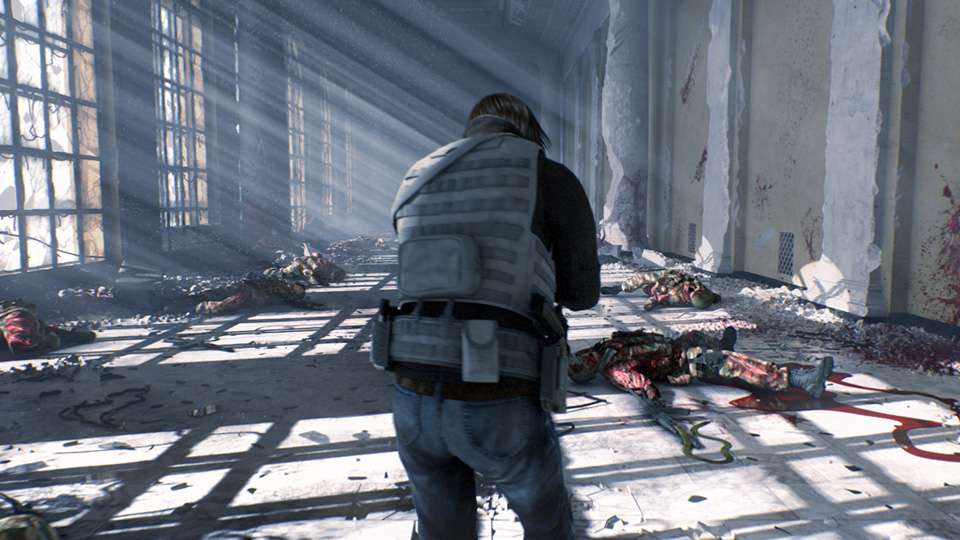
At the time of production of “Resident Evil: Damnation”, there were two big themes: to produce the stereoscopic effect (depth) and to create a sense of realism.
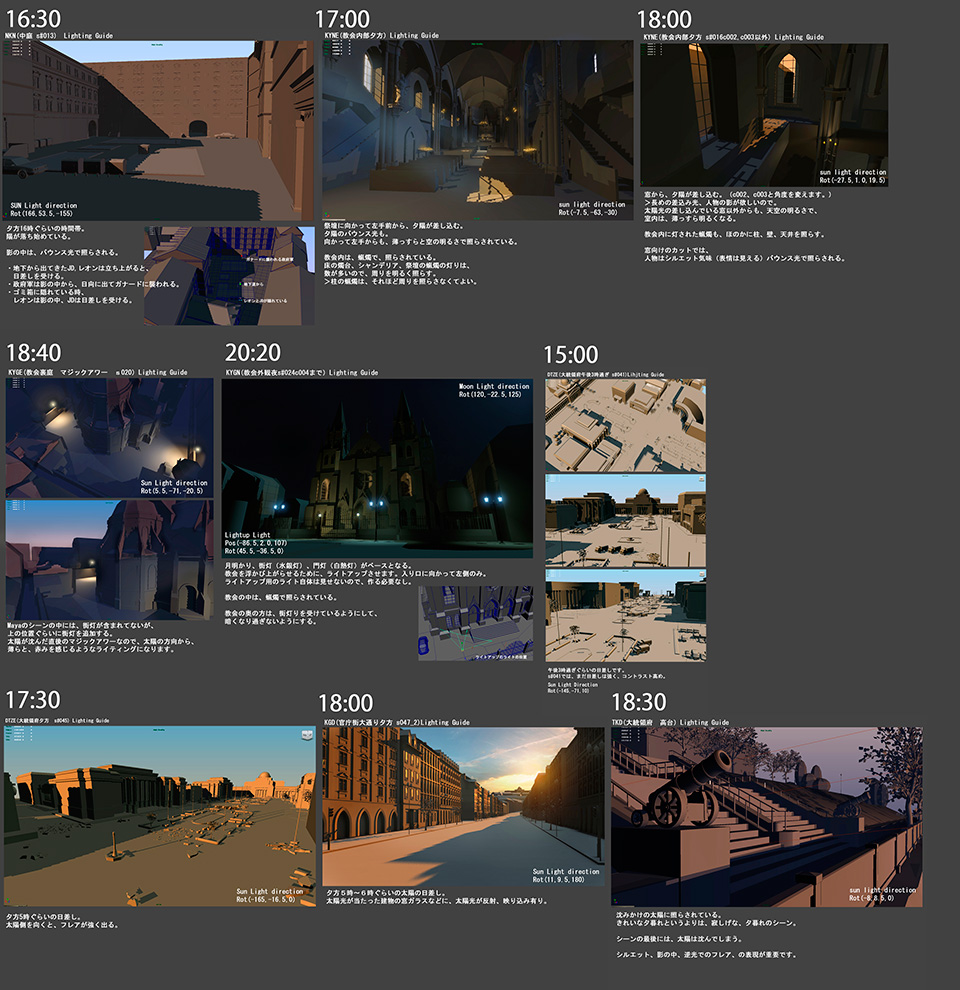
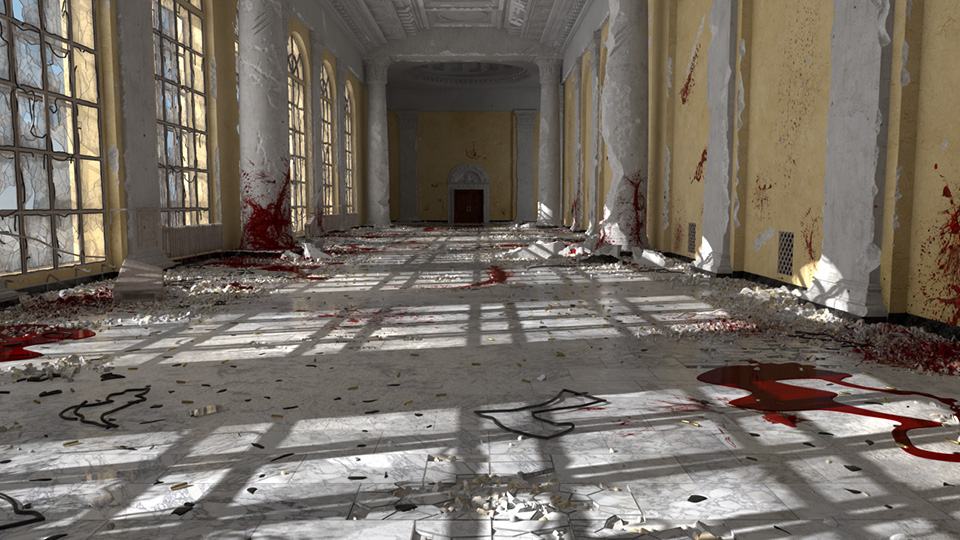
In the previous series there were only 3 situations: morning, night, and indoor; however, in this film there were several outdoor scenes. In order to create a sense of realism we decided to specify time elapse in detail. We collected many reference to study the movement of light then placed the lights in Maya software and decided on how the final shot will look like. As you can see, the guideline image (left) and the image after compositing (right) is almost identical.
Evening hour changes its face very quickly so we had to divide the afternoon hour in shorter time frames so that we have detail information on the movement of light.